By: Eugene Stevenson
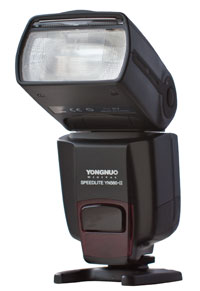
One of the gadgets on every photographers shopping list when he/she gets started is usually some sort of flash gun (speed light).
Frustrated by the puny range of the pop up flash in even a mid range DSLR leads most of us into a Clarksonesque frenzy for “more power…”
Sadly, it is only when we’ve played with our new toy that we realize that even though we can now temporarily blind even large groups of people, we still are limited to just one shot at a time. That is, we press the camera’s “go” button and then we wait for the little red light on the back of the speed light to start glowing again, in readiness for the next blast.
Try not to be despondent though. You don’t need to save for a vastly overpriced supplementary battery pack just yet. Especially if you’re using your speed light “off camera” which coincidentally is what this topic is all about.
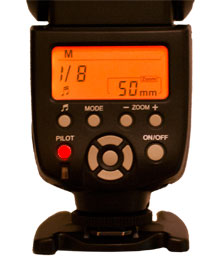
The answer you see is simple. We simply switch the flash to its manual mode and turn down the power. Less power = more shots! That’s all there is to it, well almost To understand why and how this works we need to consider what goes on inside one of these things. If we know how it works, we know how to control it.
A speed light works by building up an electrical charge, drawn from the batteries, into a thing called a capacitor. This capacitor will hold on to this charge until we trigger the flash. The capacitor then releases this charge to the lamp in the flash head and the flash fires.
“So how does reducing the power speed up our photography?” Glad you asked. Lets take a look at the diagram below.
From looking at the graph above we can see that no matter what power settings we apply on the flash itself the lamp always delivers light at the same intensity. A speed light is always “full on”.
The term power is actually a bit of a misnomer. A speed light always charges to its maximum level, what we are altering is not the level of power but the duration of the actual light burst.
This is done by interrupting the supply of electrical discharge from the capacitor to the lamp. The sooner you interrupt the discharge, the more charge you have left, ergo the more shots you have left before having to wait for red light to start glowing again.
A typical speed light may, at 1/1 (maximum output), have a flash duration of 1/200th of a second whilst at 1/128 (minimum output) may only fire for 1/20,000th of a second.
So, in a nut shell, this is what happens. You turn on your speed light, over a few second period the capacitor builds up its maximum charge. You then press the shutter release on your camera, the flash fires and if set to full power you then wait for the re-charge.
Alternatively you could reduce the output power to 1/2 and you get a second shot from the same charge. Or, 1/4 power and you get a second, third and fourth shot, all from the same initial charge etc, etc.
“That’s all very well but what about my exposure? My shot demands a shutter speed of 160th of a second and an aperture of f 5.6 and my ISO is stuck on 100. Turning down my flash will underexpose my shot…you muppet…”
O.K. then, this is where we need to be thinking in terms of off camera flash and dip our toes into the murky waters of “Light Fall Off” and “Inverse Square Law”. The beauty of this particular law of physics is that it is a lot easier to understand than it is to explain (think the off-side rule in footie).
In actual fact both terms refer to the same properties of visible light. Light Fall Off describes what happens to light as source to object distance alters and Inverse Square Law is the maths used to calculate it. Here goes then, the off-side rule of how stuff is lit up…
The effective variance of illumination of a subject, from an unfocused light source, is inversely proportional to the square of the distance between light source and subject.
Lets see that in practice, for the sake of argument we’ll say our light source (flash) is 1 metre from our model, and this gives us the default exposure.
If we move our model to two metres the light fall off equates to: 2×2 (2mtr squared) = 4. But we need the inverse which is 1/4. Ergo if we double the subject to light source distance our subject receives only a quarter of the available light. If our model is put at 4m from our flash that is 4×4=16 (inverted) =1/16. So, if our model is 4 times the distance away you need to turn your flash up to 16 times the original power for your subject to receive the same amount of illumination!
“OK already, now we know how clever you think you are, how does that help me maintain my original exposure?”
There is an obvious conclusion to all this. If doubling the distance reduces illumination to such extremes then halving the distance will increase the effective illumination proportionally. That’s it then, if you set your power (proportion of maximum output) on your flash to 1/4 and you move your flash to half the original distance to the subject, you get four times the effective illumination so everything is equal.
Shown above is a demonstration of the maths using a square (?) ice cream cone.
In part two of this discussion we now look at why speed lights are better than studio lights for freezing time and why studio lights are best when working at a distance.
By now hopefully we have all twigged that if we are doing close up work, for example the water splash shot, it is possible to achieve obscenely fast shutter speeds. Just by turning the flash power setting as low as it will go, whilst maxing out the effective illumination of our subject by moving our flash gun really close.
Below we see a chart showing light fall off as a percentage of original available light.
Now we take a closer look at the rate of fall off relative to distance to see what happens when our light source to subject distance is a little greater.
On page one we talked about the differences in illumination in terms of fractions 1/4, 1/16 etc. The chart above expresses these differences as a percentage of what is assumed to be maximum illumination at a distance of 1m (light source to subject).
As can clearly be seen the fall off has a more dramatic effect the nearer we get to the starting point. This is great for us working at close distances as we can effect great control over exposure just by moving the light source a little bit one way or another.
Those working at a greater distance can also benefit greatly from this same principal but for different reasons. So who works at greater distances? Anybody using studio lights that’s who. Before we discuss why, lets first consider the differences between speeds lights and studio lights. It isn’t all a case of “big car syndrome”.
So here is a list of the main similarities between speedlights and studio lights:
- They both illuminate our subject with a very short lived flash of very bright light.
- They both provide this light via something called a Xenon tube (Xenon= a noble gas that produces intense light when an electrical charge is passed through it).
- The charge required to produce the flash is provided by a capacitor.
- They both require the user to wait for a “beep”, as the capacitor charges, before they can be used.
- They are both, in the main, grossly overpriced.
Now the two big differences:
- Whereas a speed light adjusts output by altering the duration of the flash, studio lights adjust output by altering the level to which the capacitor is charged, and then discharges fully. This full discharge takes longer (a lot longer) so avoid studio lights if you’re trying to “catch a speeding bullet”. That is unless you have lots and lots…and lots, of money.
- Studio lights generally give a much bigger bang for you buck, more light=greater efficiency at distance.
Which brings us neatly to what benefits there are to working at distance with “bigger” flashes of light.
Suppose you are in your studio and you are shooting a couple of models, one in front of the other. For whatever reasons, they are 1m apart.
If we look at the graph above and imagine the front model is 3m away from the light source and the second model is 4m away, then we can see that the model in front is receiving almost twice as much light as the model at the rear. That is, 11% versus 6% of the potential maximum illumination. The likelihood is the model to the rear will be seriously underexposed.
Now, as you have a set of über powerful studio lights with a big GN classification and thus much longer reach than any limp wristed speedlight, you can afford to put more distance between light source and models. So, you put model one at 7m from the light source and model two at 8m. Look at the graph, the difference is now negligeable. This idea is great for working with group shots where a balanced exposure is essential.
So that is basically it. If you’re working with fast moving subjects and you want sharp edges, use a speed light with the power turned down and get in close to compensate for the loss of light. If you are working in group portraiture and want an even spread to your lighting use studio lights and move further away. Simples!
This tutorial was written, and graphics produced by, Eugene Stevenson © 2014.